Getting Started with Snowflake Intelligence: A Practical Guide
![]() 10 minute read
10 minute read
15 December 2025
We’ve all seen the demos: a user asks a complex question, and the AI instantly generates a perfect chart and a root-cause analysis. It’s impressive, but as data practitioners, we know that the distance between a demo and production is usually paved with a lot of engineering.
With Snowflake Intelligence (built on Cortex Agents), we are moving closer to that reality. However, for it to work effectively, we need to shift our mindset. This isn't just about "chatting with your database"; it’s about building an orchestration layer that allows an LLM to understand your specific business context.
If you’re looking to explore this, here is a practical guide on the mental shift required, the actual build steps, and why your underlying data model matters more than ever.
The mental shift: It’s an orchestrator, not a chatbot
To get this right, stop thinking of Snowflake Intelligence as a chatbot that magically "knows" your data. Instead, view it as a project manager.
When a user asks a question, the agent evaluates the specific tools you have provided to determine the best path forward:
- Cortex Analyst: To understand and query your structured data (SQL).
- Cortex Search: To understand your unstructured documents (PDFs, Wikis, Transcripts).
- Verified Queries: To answer specific, high-value questions with 100% accuracy.
Your job isn't to train the LLM. Your job is to give it the right tools.
How to start: The build process
Setting this up is a process of assembling context. We will follow a five-step path using the official Snowflake "Getting Started" examples (Getting Started with Snowflake Intelligence). You will need a Snowflake account and the ACCOUNTADMIN role to complete these steps.
Step 0: The setup script
Before building the agent, we need a playground. You can run this setup.sql script to bootstrap the environment. This script handles the infrastructure plumbing:
- Sets the foundation: Creates a dedicated Role (SNOWFLAKE_INTELLIGENCE_ADMIN), Warehouse (DASH_WH_SI), and Database (DASH_DB_SI) to isolate this project from production.
- Hydrates the data: Ingests sample retail datasets (Sales transactions, Product lists, Support transcripts).
- Enables "agency": Deploys a Python stored procedure (SEND_EMAIL) that gives the agent permission to "talk" to the outside world.
Step 1: Use your dimensional model
Do not point an agent directly at raw data warehouse tables. Raw tables often contain technical debt (cryptic column names, deleted flags, or system columns) that confuse the LLM.
This is where a strong dimensional model becomes your best asset. You generally don't need to build "special views" just for the agent. The same clean, modelled data that powers your existing BI dashboards is usually the best foundation. Well-modelled data makes the AI's life significantly easier because it already possesses the traits the agent needs:
- Descriptive names: It uses clear business terminology (e.g., total_revenue_usd) rather than cryptic source abbreviations (ttl_rev).
- Flattened logic: Complex joins and business logic are often pre-calculated, giving the agent a simpler surface to query.
- Documentation: It (hopefully) includes comments. Run COMMENT ON COLUMN commands if you haven't. The agent uses these descriptions to decide which column answers a user's prompt.
- Agreed metrics: The work has already been done to decide what metrics to track and how they are calculated in your business.
Note: Since Snowflake's example retail dataset is already well-structured, we will bypass the modelling step for this demonstration.
Step 2: Configure Cortex Search (The "Unstructured" Brain)
To let your agent read unstructured data (like customer support tickets or contracts), you use Cortex Search. This tool enables RAG (Retrieval Augmented Generation) by finding relevant text "chunks". To set this up, you navigate to AI & ML > Cortex Search in Snowsight.
Note: We’re keeping it simple here to get you started, but keep in mind that optimising search for production scale often involves deeper engineering around data ingestion and retrieval strategies.
When configuring this service (e.g., for a SUPPORT_CASES table), you must make two critical decisions:
- Searchable Column (the content): This is the "meat" of the data, such as the TRANSCRIPT column. If a user asks, "Why are customers returning the X-200?", the agent scans this column for semantic matches like "broken hinge". Rule of thumb: If you want to summarise it, it’s searchable.
- Attribute Columns (the filters): These are metadata columns like TITLE or PRODUCT. The agent uses these to narrow down the universe of data before reading. If a user asks about "T-Shirt" issues, the agent filters for "T-Shirt" rows first, avoiding hallucinations from irrelevant product data.
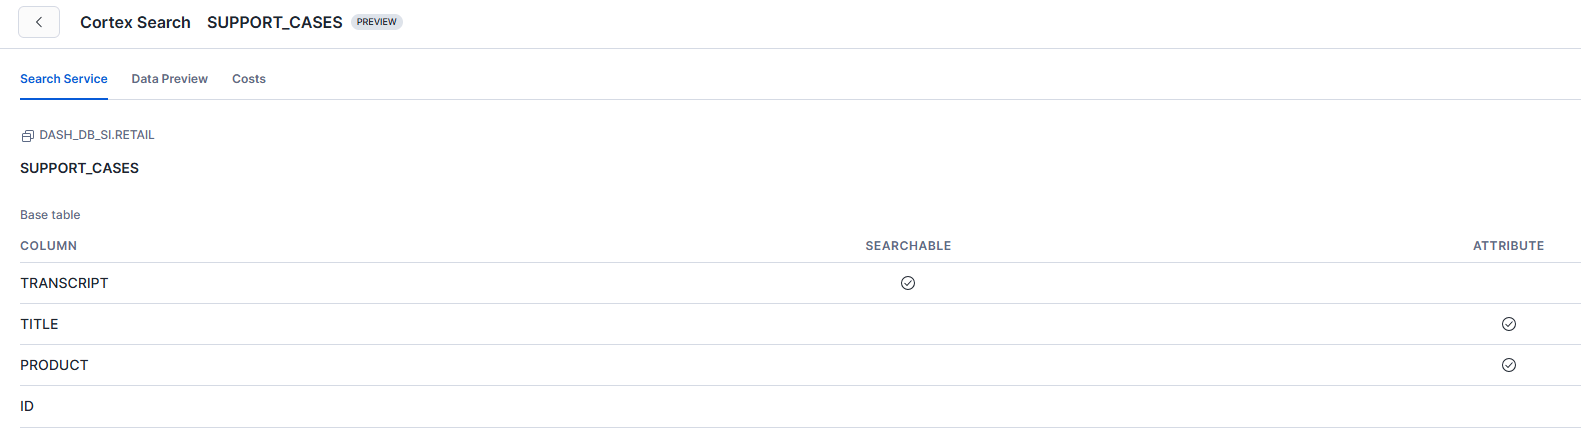
Pro-Tip: Don't mark everything as "Searchable." Titles are often too vague to be useful as primary content; keep them as Attributes.
Step 3: Configure Cortex Analyst (The Semantic Model)
This is the most important step. You will define a YAML file (using the Snowflake Open Semantic Model standard) that maps natural language to your physical data.
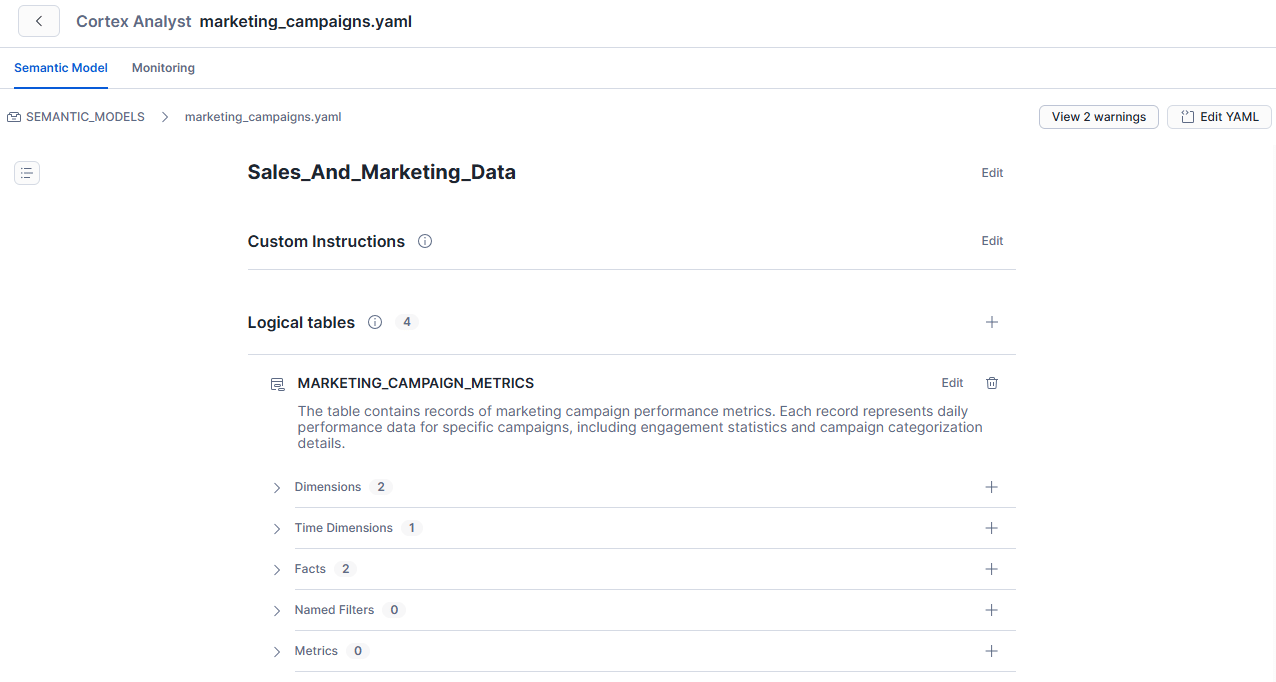
Using the marketing_campaigns.yaml example provided in the source, here is how the file defines your business concepts:
- Entities and dimensions: It defines what a "Marketing Campaign" is by specifying dimensions like CAMPAIGN_NAME and CATEGORY. It also explicitly maps relationships, such as connecting MARKETING_CAMPAIGN_METRICS to SOCIAL_MEDIA data so the AI understands how they interact.
- Measures: It explicitly defines the maths, so the AI doesn't guess. For example, it defines CLICKS and IMPRESSIONS as specific facts, ensuring the AI knows exactly which number represents user engagement versus ad display.
- Synonyms: It maps business jargon to actual data columns. In this file, terms like "ad_clicks," "hits," and "selections" are all mapped to the CLICKS column, while "promo_name" is mapped to the CAMPAIGN_NAME column.
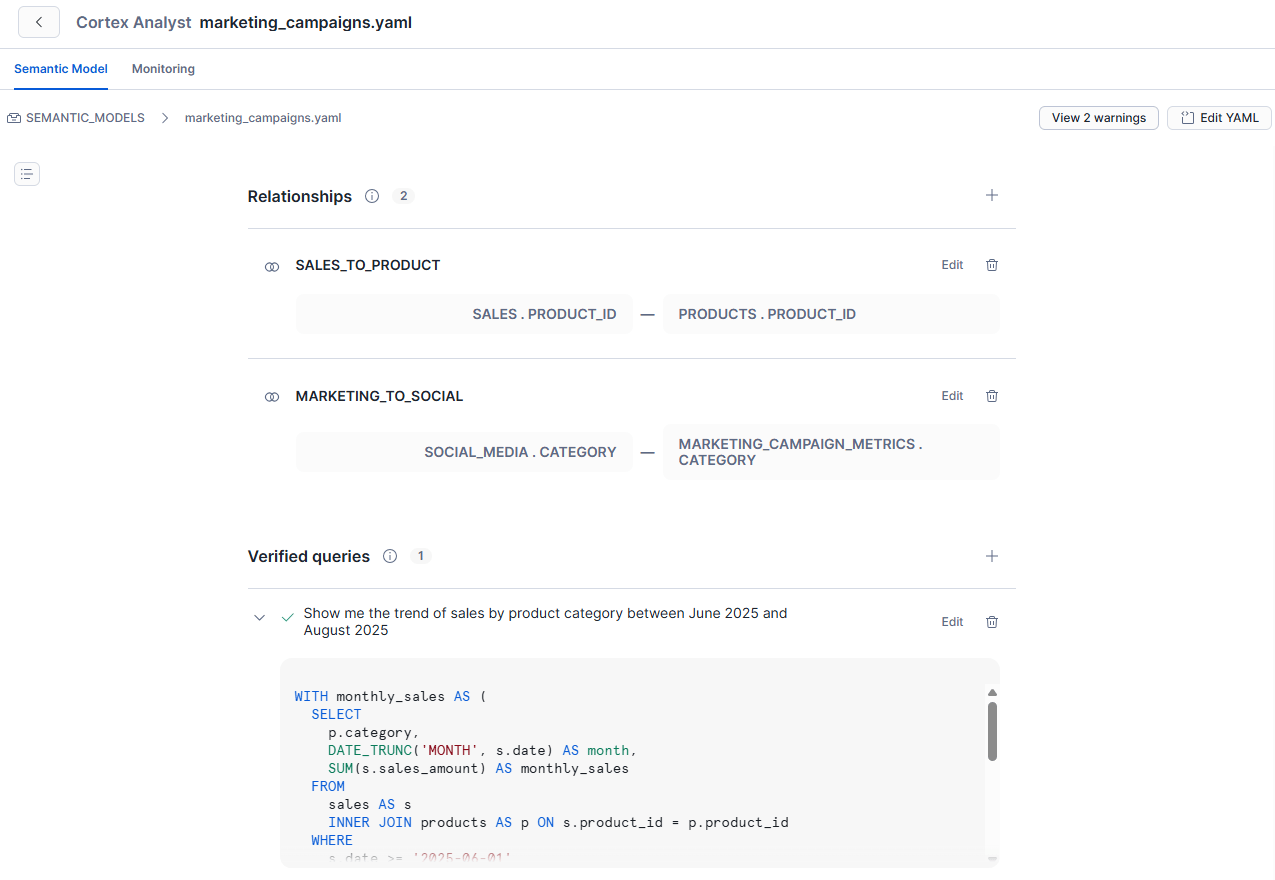
- Verified Queries: It includes pre-verified SQL for high-value questions to ensure 100% accuracy. For instance, the file includes a verified query for "Show me the trend of sales by product category between June 2025 and August 2025," ensuring that specific date logic is handled correctly every time.
Once you upload this YAML file in the Snowflake UI (under AI & ML > Cortex Analyst), it is transformed into a semantic model that serves as the brain for your structured data.
Snowsight will also display the different relationships and verified queries from the YAML file.
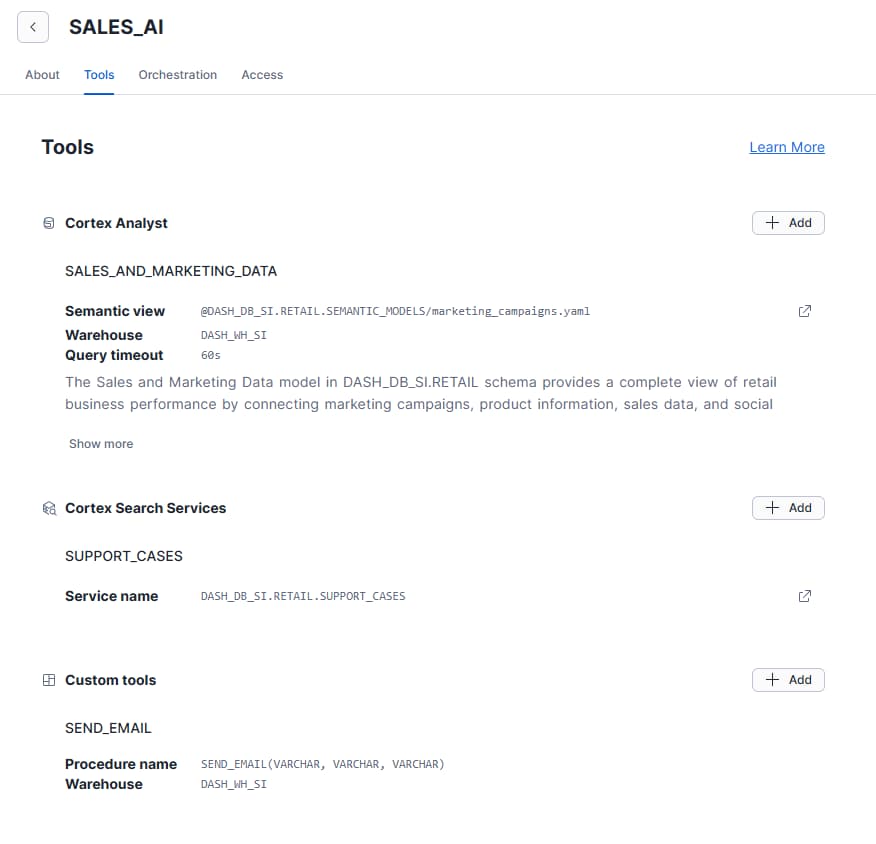
Step 4: Configure the Agent (The "Orchestrator")
Now, we turn these services into a cohesive application. In Snowflake Intelligence, the "Agent" decides which combination of tools is needed to answer the user's intent.
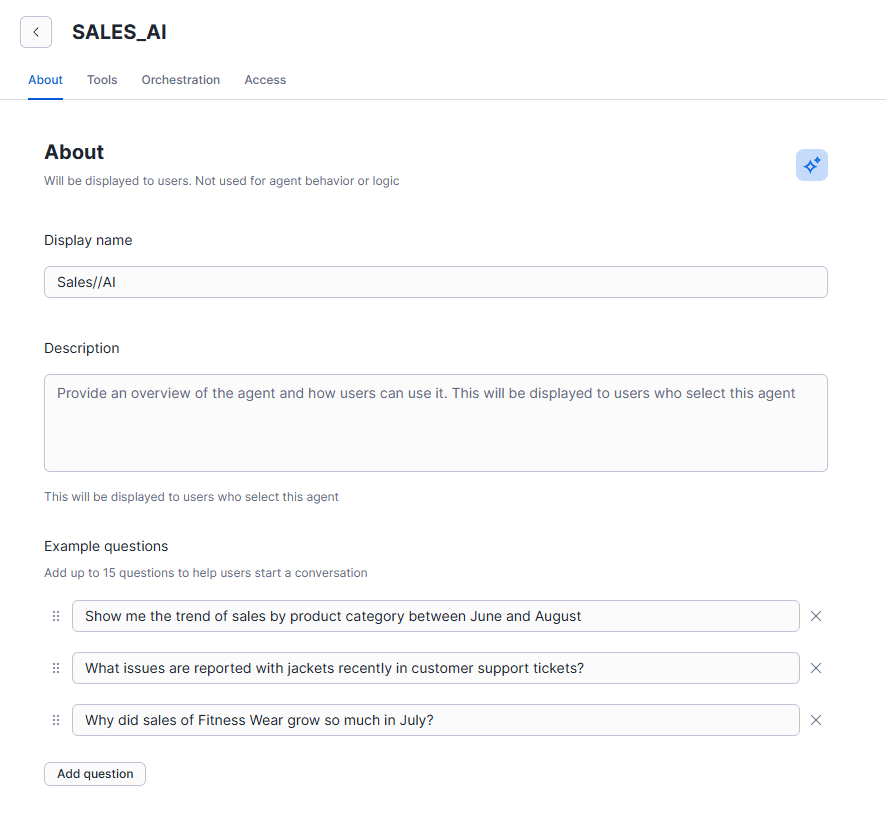
When configuring your agent (e.g., "Sales//AI"), you focus on three layers:
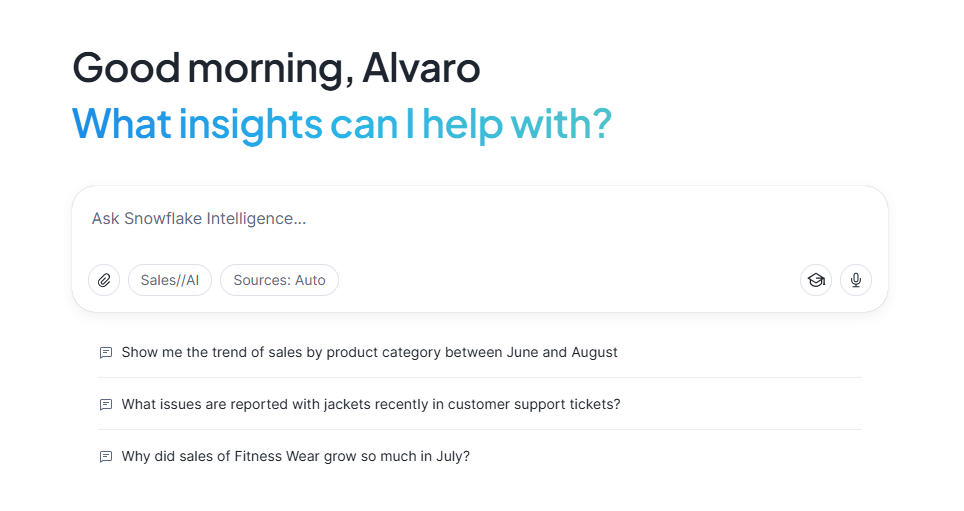
A. The Persona
A blank chat window is intimidating. Add example questions to signal capabilities.
- "Show me sales trends..." signals structured data capability.
- "What issues are reported..." signals unstructured search capability.
B. The Toolkit
You don't just add tools; you write descriptions for them. The LLM reads these to route the request.
- Cortex Analyst (the structured analyst): Connect your semantic model. A good description helps the LLM know that "Influencer impact" questions belong here.
- Cortex Search (the researcher): Connect your Cortex Search service. Map IDs so the agent can cite sources.
- Custom tools (the action handler): Add custom tools, like a SEND_EMAIL() stored procedure. You can define parameters with natural language, such as "If body is not provided, summarise the last question".
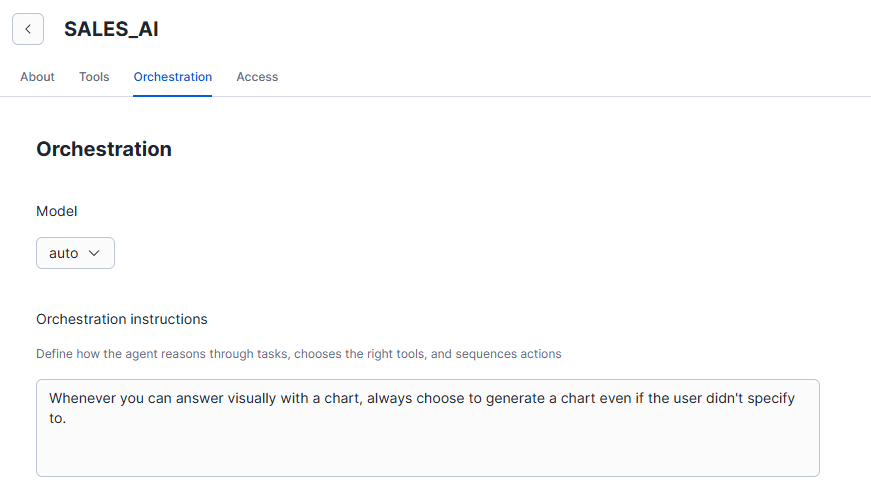
C. Orchestration Logic
Finally, give the agent a "Global Directive." For example: "Whenever you can answer visually with a chart, always choose to generate a chart even if the user didn't specify to.". This forces proactive, visual responses rather than dry tables.
Step 5: Iteration and testing
You aren't done when you click "Create". You must enter a testing phase:
- Run queries where you know the answer.
- Review the generated SQL logic.
- If the agent picks the wrong column, go back to Step 3 and update the YAML synonyms or descriptions.
Capabilities: What It Can Actually Do
Once the plumbing is in place, navigate to AI & ML and open Snowflake Intelligence.
The capabilities of the new agent bridge the gap between structured and unstructured data.
- Hybrid analysis: You can ask, "Show me the sales decline for Q3" (SQL) and follow up with "Summarise the manager comments for that region" (Search) in one flow.
- Actionable insights: Agents can trigger workflows (like emails) based on the data found.
- Verified answers: Implement a "trust layer" where specific questions trigger pre-verified queries rather than generating fresh SQL.
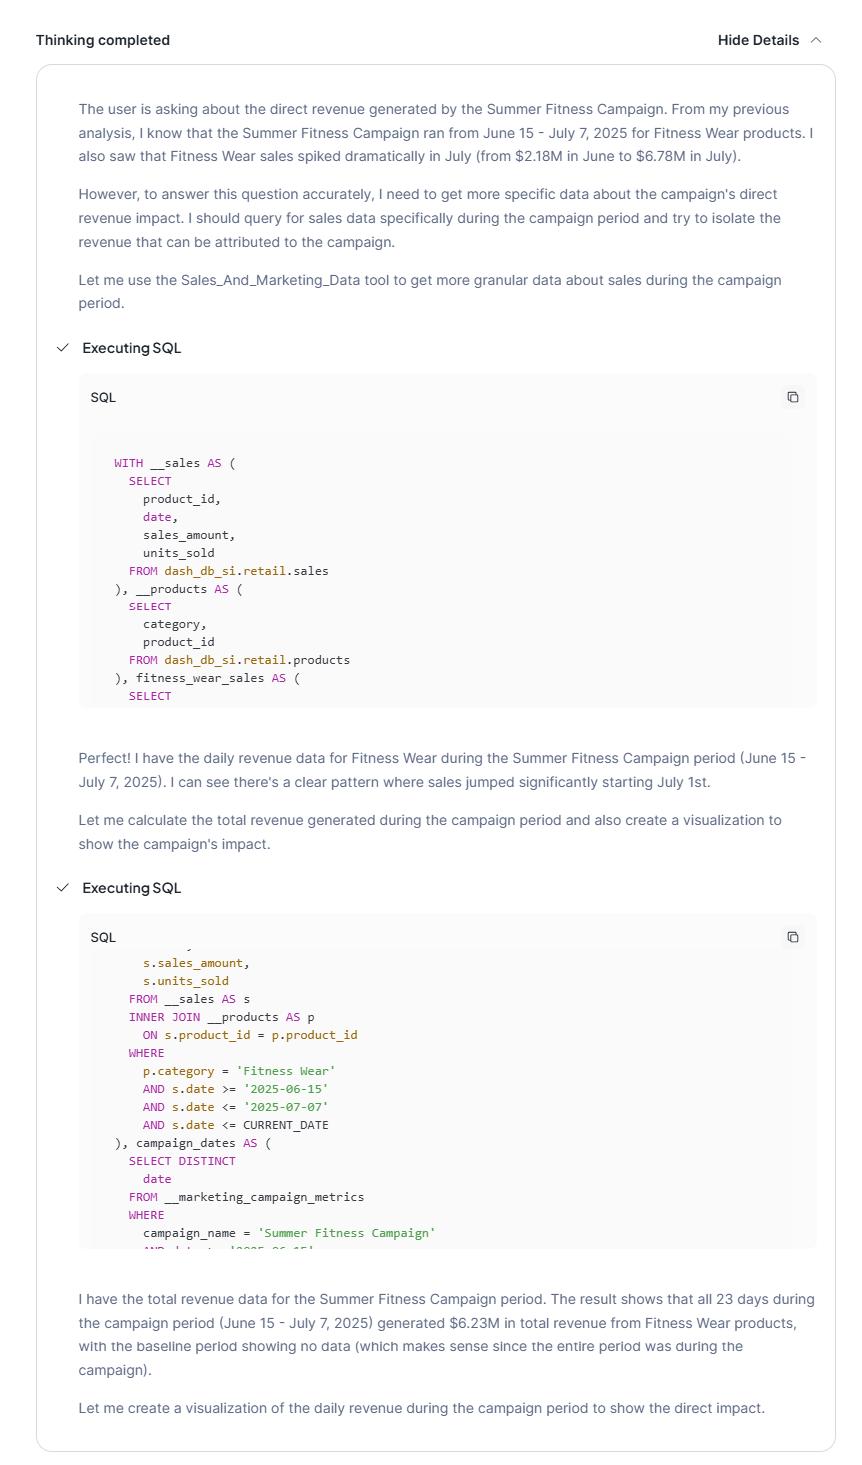
The Prompt:
"Show me the sales trend for 'Fitness Wear' from June to August and summarise the top manufacturing defects reported for 'Jackets' in support transcripts."
This screenshot shows the "Thinking" box (not the actual agent response that is then output to the chat user). The “Thinking” box displays the orchestration logic and SQL queries the agent used to generate the final response.
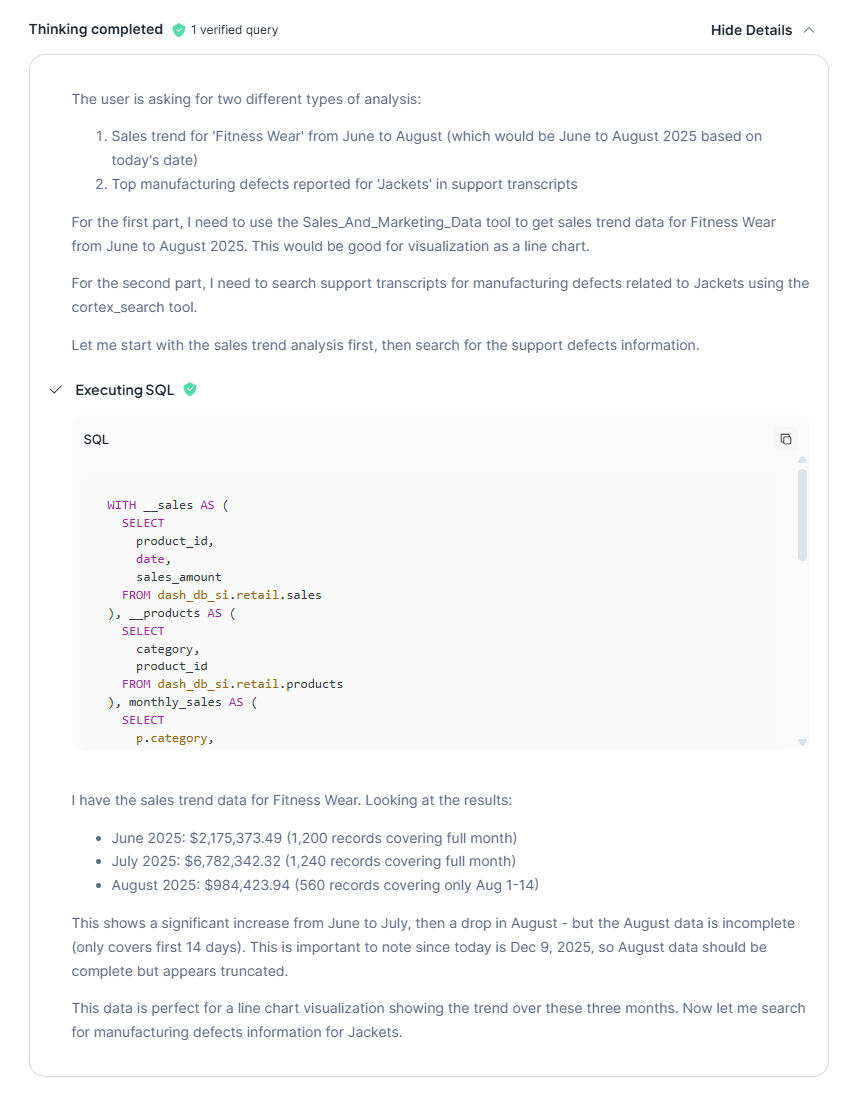
Why it works: The agent can split this complex request into two distinct operations:
- Structured SQL: It queries the semantic model to visualise the specific sales spike (e.g., the jump to $6.78M in July).
- Unstructured search: It pivots to Cortex Search, filters for "Jackets," and reads the transcripts to find the qualitative "Why" (e.g., "seam tears" and "manufacturing defects").
- Synthesis: It presents the hard numbers alongside the root cause in a single response.
Common Pitfalls (And How to Break It)
If you treat this as a plug-and-play solution, you will run into issues.
- The "Join" confusion: If you don't explicitly define relationships in your semantic model, the AI might join tables incorrectly (e.g., sales to employee on the wrong ID), inflating numbers.
- Vague intent: Users often ask, "How are we doing?" The AI doesn't know if that means profit, volume, or efficiency.
The most dangerous pitfall isn't an error message; it's inflated logic caused by the "join confusion".
The Prompt:
"How much revenue did the Summer Fitness Campaign generate directly?"
Why it fails (The Silent Trap)
If your semantic model doesn't explicitly define how "Campaigns" link to "Sales" (e.g., via an attribution key), the AI will guess.
- The Guess: It will likely join the tables based on Date and Category.
- The Result: It will sum every single sale of Fitness Wear during the campaign dates and present it as "Campaign Revenue."
- The Reality: This drastically inflates the number ($6.23M) because it fails to distinguish between organic sales (baseline) and ad-driven sales.
The Fix
Start with a solid data model and be explicit in your joins and definitions. The AI cannot infer attribution logic; you must define it in the YAML or the underlying view.
Conclusion: The Governance Imperative
We’ve walked through the technical setup but remember: Snowflake Intelligence is only the engine. Your governance strategy is the fuel.
As you move from this demo to production data, realise that this new era makes data governance the most critical part of the stack. To ensure a seamless experience, you must keep three core tenets in mind:
- Modelling is IP: Your YAML definitions are the brain of the AI. Loose definitions lead to loose answers.
- Documentation is code: The descriptions of each column are no longer just for humans; they are functional instructions that tell the LLM how to think.
- Security is paramount: The agent respects RBAC. If your Row-Level Security isn't set up, the agent could summarise sensitive data for unauthorised users.
Snowflake Intelligence is a powerful tool. It shifts the workload from building dashboards to building meaning. If you invest time in your modelling and semantic layer and get the governance right, you will turn your raw data into a trustworthy, conversational asset.
If you’re ready to take the next step, consider speeding up your adoption with our Snowflake Intelligence Accelerator Program. Our team can guide you through the steps to take to start your journey.
Topics
Related insights
Share
Other insights


Contact us via the form on our website or connect with us on LinkedIn to explore the best solution for your business.