


Anandraj Jagadeesan, Principal Consultant – Altis Sydney
I wrote the blog on Installing Ubuntu Bash for Windows 10 using WSL (Windows Subsystem for Linux) a few years back. This has been one of the most popular blog pages on the Altis site. Since then, Microsoft has made improvements and released the WSL2 version and subsequently, the installation steps and system requirements have changed. In line with the WSL updates, I am providing an updated overview of the installation steps in the original blog.
With the growth of public cloud, DevOps practices and continued acceptance of Linux based workloads in production has reinforced the need to have native Linux support on Windows. So, Microsoft has started shipping a real Linux kernel with Windows that will make full system call compatibility possible. Improvements in WSL2 have made dramatic file system performance increases, and full system call compatibility, meaning you can run more Linux apps in WSL2 such as Docker. VS Code can integrate with WSL2 using the Remote-WSL extension. WSL2 provides the ability to run a complete set of Ubuntu tools, VS Code and utilities (e.g. Docker, Git, Python, Spark and all the data munging Linux commands) natively on Windows 10.
Microsoft has brought “native” Linux capabilities to Windows 10 by allowing you to install Ubuntu Bash. During the initial days, Microsoft achieved this by building the WSL by working with Canonical to run Ubuntu on top of WSL. With continued support from Microsoft, more distros such as SUSE, Alpine, Kali, Debian have followed the steps of Ubuntu and released their distros for WSL. This means developers using Windows machines have access to the complete Linux command line toolset (vi, grep, awk, sed, etc..) and can run their favourite distro on Windows. This avoids clunky workarounds like Virtual Machines and Cygwin that can slow down your machine. So, the bottom line is that Windows users can now get the same Linux experience that they get on a Mac or Linux desktop.
Check System Requirements:
Before you start to setup WSL2, you must satisfy Windows 10 version requirements. You can check this by opening the “About my PC” option from Windows Start and check that the version is “1093” or above and with Build 18362 or Higher. If not, you can still install WSL1 by only completing steps 1 and 5.
Installation steps:
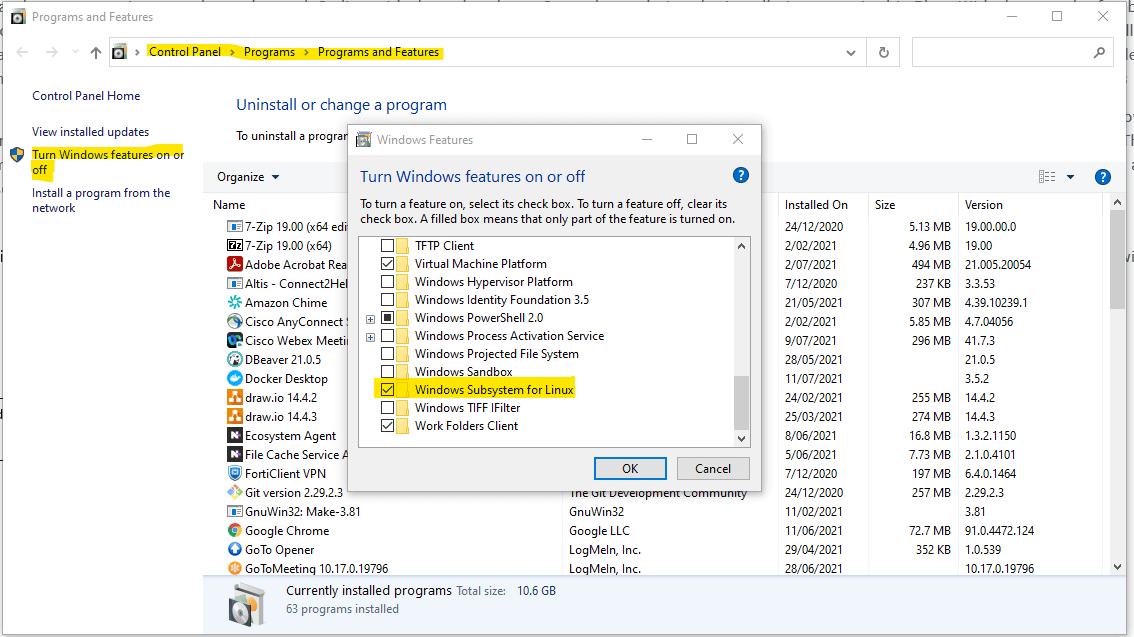
Step 1: Enable the Windows Subsystem for Linux
You must first enable the “Windows Subsystem for Linux” optional feature before installing any Linux distributions on Windows.
Using PowerShell as administrator, execute:
dism.exe /online /enable-feature /featurename:Microsoft-Windows-Subsystem-Linux /all /norestart
If you prefer updating using UI, then go to the Control Panel -> Programs and click “Turn Windows feature on or off”. Enable “Windows Subsystem for Linux.
If you are not enabling WSL2, reboot your machine and move to Step 5 to install your preferred Linux distribution else move to Step 2 without rebooting.
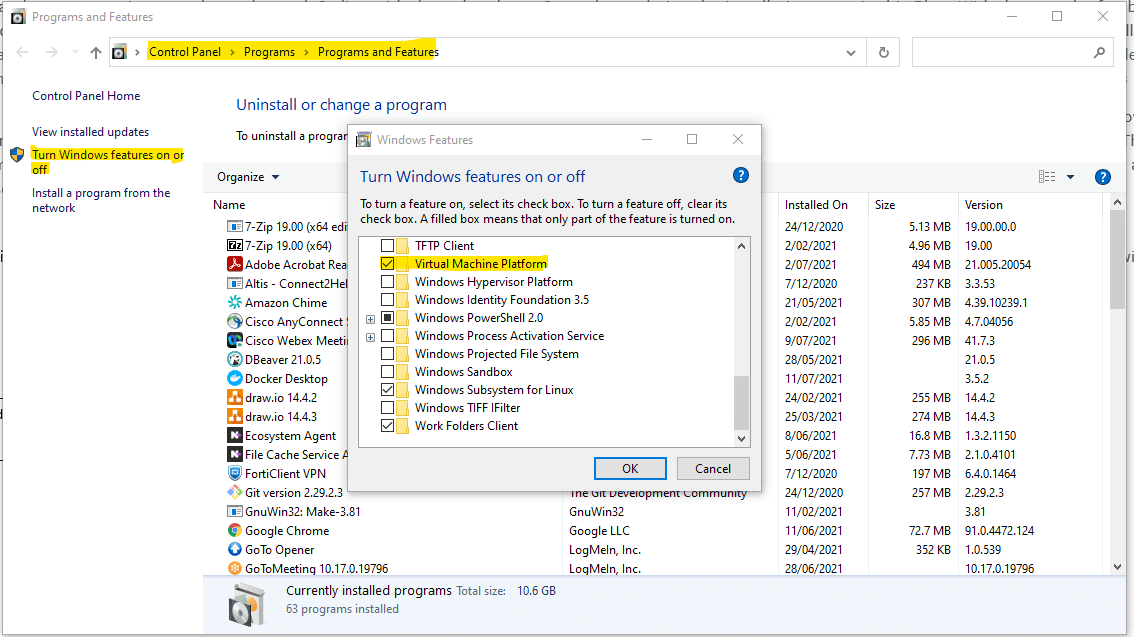
Step 2: Enable Virtual Machine feature
Using PowerShell as administrator, execute:
dism.exe /online /enable-feature /featurename:VirtualMachinePlatform /all /norestart
If using UI, then go to the Control Panel -> Programs and click Virtual Machine Platform
Reboot your machine to complete the WSL install and update to WSL2.
Step 3: Install Linux Kernel update package
- Download the latest package from WSL2 Linux kernel update for x64 machines.
- Run the downloaded package. Double-click to run – you will be prompted for elevated permissions, select ‘yes’ to approve this installation.
Step 4: Set WSL2 as your default version
Open PowerShell and run this command to set WSL2 as the default version when installing a new Linux distribution:
wsl --set-default-version 2
Step 5: Install your preferred Linux distribution
Go to Microsoft Store App on your PC and search for Linux to install your favourite distribution. Alternatively click the link https://aka.ms/wslstore .

The following links will open the Microsoft store page for each distribution:
- Ubuntu 18.04 LTS
- Ubuntu 20.04 LTS
- openSUSE Leap 15.1
- SUSE Linux Enterprise Server 12 SP5
- SUSE Linux Enterprise Server 15 SP1
- Kali Linux
- Debian GNU/Linux
- Fedora Remix for WSL
- Pengwin
- Pengwin Enterprise
- Alpine WSL
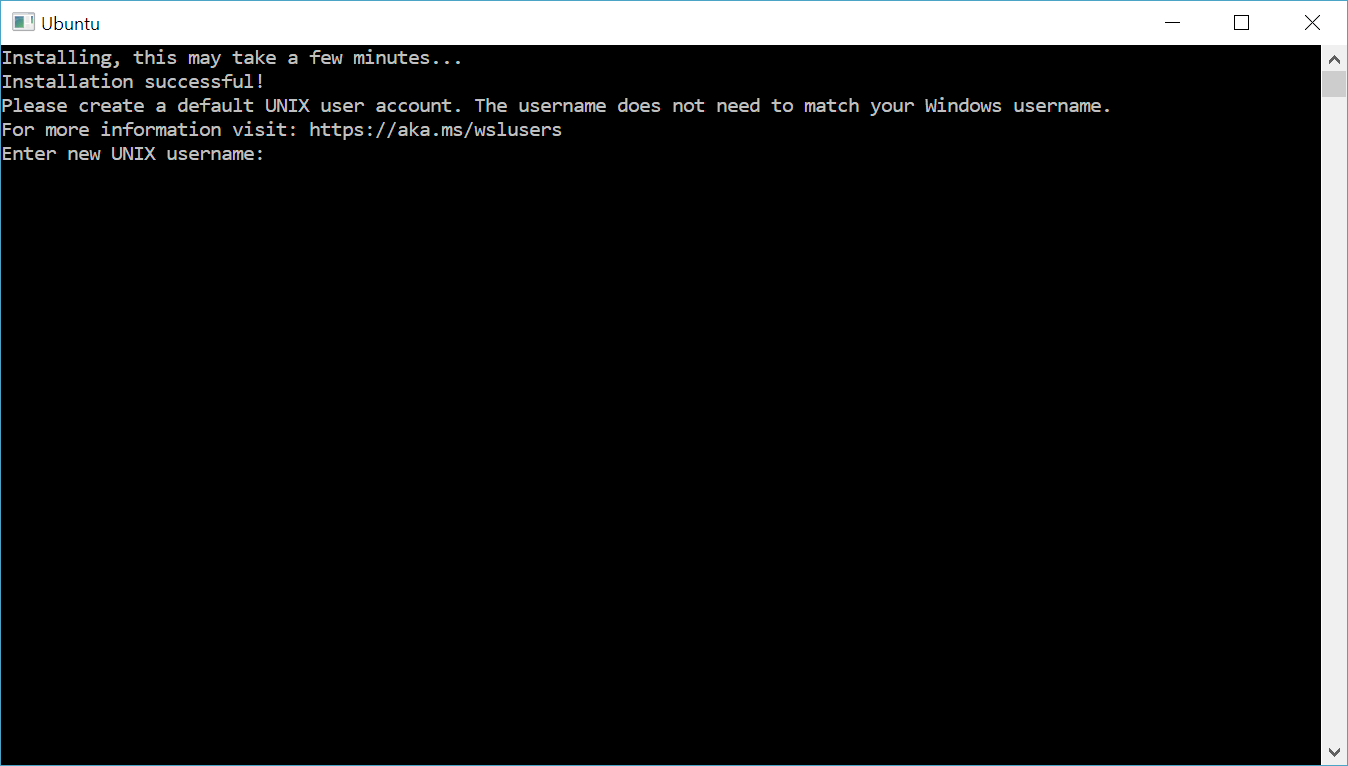
From the distribution’s page, select “Get”. Once Install select “Launch”

The first time you launch a newly installed Linux distribution, a console window will open, and you will be asked to wait for a minute or two for files to de-compress and be stored on your PC.
Then create a user account and password for your new Linux distribution.
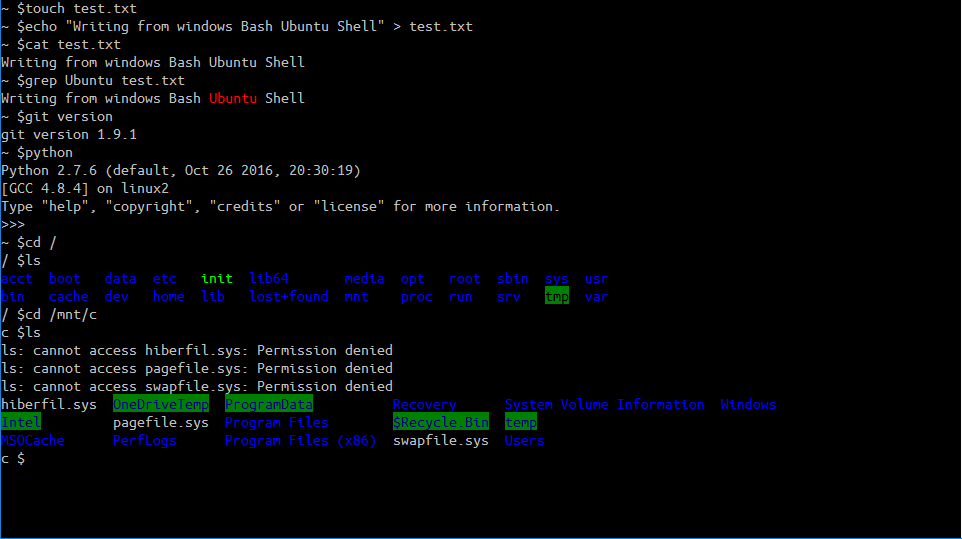
After completing this process, you will now have a full Ubuntu command-line and can use Linux command to install software from distro’s repositories.
In theory all binaries should work, but beware that not every application may work flawlessly. Also note that graphical applications and desktops are not supported and running server applications is not recommended. It is a great tool for development purposes.
You can become “root” user and have full system access, like the “Administrator” user on Windows. Your Windows file system is located at /mnt/c in the Bash shell environment.
To troubleshoot the installation refer to Trouble Shoot Installation
Watch this space for the next blog in the series that will look at how to get Docker on Windows 10 WSL2 which uses full system call compatibility.
For information on how we can help with your data & analytics journey, please connect with us here.
References: